|
Basic Cooking Techniques: How to Grill
|
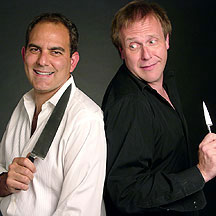
Article By: Bruce Weinstein and Mark Scarbrough
|
Every month, enjoy the simple but elegant pleasures of a delicious, easy-to-prepare meal.
Busy or not, here we come. Every month “A Cut Above” serves up new recipes, cooking tips and ideas for dishes that are elegant in taste and presentation, yet simple enough to prepare and enjoy in a snap.
A Grill’s HeatAlthough not as exacting as an oven’s, a grill has three basic levels of heat:
- High Heat: 500°F
- Medium Heat: 400°F
- Low Heat: 300°F
These temperatures are guidelines; not rocket-science but mere approximations.
Experienced grillers test their grills by “feeling” the heat. If you want to do the same, place your open palm 5 inches above the grill grate. The fire is . . .
- High if you have to move your hand in 2 seconds
- Medium if you have to move your hand in 5 seconds
- Low if you have to move your hand in 10 seconds
Summertime and the grillin’ is easy. The barbecuing, too — although in cheffy parlance, grilling is quite different from barbecuing. When you grill, you cook foods directly over medium or high heat. That’s what most of us do on a grill.
When you barbecue, by contrast, you cook food over “indirect,” low or medium heat — that is, to the side of a lower heat source, not directly over it. We’ll have a lot more to say about that method in next month’s column.
For now, let’s concentrate on grilling. First a little background: Grilling works because the high heat caramelizes the external proteins and sugars naturally found in food. When heated, these complicated chemical compounds begin to shake and vibrate, tossing out all sorts of simpler compounds which are in fact the very things most of experience us as flavor.
The grill’s intense sear, therefore, causes lots of chemical breakdown — and thus, lots of flavor. No wonder we all love to grill.
So what do we need to know to grill right every time? There are three rules:
- Cover the grill. You wouldn’t bake in the oven with the door open. An open grill takes much longer to cook food because the heat dissipates and the fire is in constant need of adjustment. Sure, pit masters at cook-offs leave their grills open some of the time; but for a home cook with hungry kids and friends to feed, it just makes more sense to conserve the heat and get dinner on the table. Besides, a closed grill gets more smoky flavor into everything.
- Don’t fuss. Ever seen someone standing over a grill, flipping the food this way and that with shocking abandon? There’s no reason for it. You want the heat to caramelize those proteins and sugars — so leave the food alone over the fire.
- Clean the grate. You wouldn’t cook in a skillet that hasn’t been cleaned. And the best time to clean the grate is after you’ve finished grilling. When you’re done, close the lid, keep the fire going for 5 or 6 minutes, and let it burn off any extraneous bits of this and that on the grate — then give the very hot grate a good scrape with a wire brush so you’re good to go next time you’re ready to grill.
About the Grilled Vegetable Antipasto
Since grilling is all about caramelizing external sugars and proteins over a fairly intense heat, you need ways to conduct that heat directly to the food’s cells. Frankly, there’s no better medium than a little fat, which gets super-hot over the fire and brings those sugars and proteins immediately into play. This simple appetizer or side dish lets the veggies marinate in an olive oil and balsamic vinegar mixture for a spiky, bright taste.
Grilled Vegetable Antipasto
Makes 8 servings
PointsPlus™ values | 2 per serving Ingredients- 2 medium red bell peppers, cored, seeded and cut into 1-inch wedges
- 2 medium green bell peppers, cored, seeded and cut into 1-inch wedges
- 2 medium zucchini, cut into 1/2-inch-thick rounds
- 2 medium yellow crook-neck squash, cut into 1/2-inch-thick rounds
- 1 medium eggplant, stemmed, cut in half lengthwise and then cut into 1/2-inch-thick half-moons
- 2 Tbsp olive oil
- Cooking spray for the grill grate
- 2 Tbsp balsamic vinegar
- 1 Tbsp minced fresh oregano leaves
- 1 tsp salt
- 1 tsp freshly ground black pepper
Instructions- Toss vegetables with remaining ingredients and set aside.
- Off heat, coat grill with cooking spray. Prepare gas grill for direct, high-heat grilling or build a high-heat charcoal bed in the center of the coal grate on a charcoal grill.
- Place the vegetables directly over the heat source on the prepared grate. Cover and grill until the vegetables begin to char in places and develop distinct grill lines, about 6 minutes.
- Turn the vegetables with tongs and continue grilling until they again have distinct grill lines over the fire and have begun to soften, about 4 minutes.
- Transfer all the vegetables back to the bowl with any remaining marinade. Toss gently and serve.
- Serving size: 2 cups.
About the Grilled Trout Stuffed with Lemon and Oregano
Nothing’s better on the grill than boneless trout: The meat becomes irresistibly smoky and sweet, a great foil to lemon juice and fresh herbs. Make sure you have a wide, metal spatula to turn the fish so it doesn't fall apart. Since you will not eat the head, tail or fins, each trout will yield two servings, about 3 ounces each.
Grilled Trout Stuffed with Lemon and Oregano
Makes 4 servings
PointsPlus™ values | 4 per serving
Ingredients
- Cooking spray
- 1 medium lemon
- Two 8-oz fresh whole boneless trout (do not use fillets)
- 1 tsp salt
- 1 tsp freshly ground black pepper
- 8 oregano sprigs
Instructions
- Off heat, coat grill with cooking spray. Prepare gas grill for direct, high-heat grilling or build a high-heat charcoal bed in the center of the coal grate on a charcoal grill.
- Cut the lemon in half, lengthwise. Use a very sharp knife to cut one half into paper-thin half-moons.
- Season the trout inside and out with salt and pepper. Stuff 4 oregano sprigs and half the lemon slices in the body cavity of each trout.
- Place the trout on the prepared grill grate, directly over the heat. Cover and grill for 8 minutes.
- Squeeze some of the lemon juice from the remaining lemon half over each trout, turn them with a large spatula, squeeze more lemon juice over each trout, cover and continue grilling until the meat will flake with a fork, about 6 more minutes.
- Serving size: 1/2 trout (3 oz meat).
About the Moroccan Chicken Kebabs
Kebabs are a favorite on the grill. And no wonder; meat and veggies, all on one skewer, swapping flavors and getting done at the same time. There are two kinds of skewers for making kebabs: metal and bamboo. Sturdy metal skewers need no extra care and heat up to cook from the inside out. Bamboo skewers, on the other hand, do need a little care: soak them in water for 20 minutes before using to make sure they don’t ignite over the heat. When the food has been threaded onto the bamboo skewers, wrap their ends in aluminum foil to keep them from charring and falling apart.
Moroccan Chicken Kebabs
Makes 4 servings
PointsPlus™ values | 5 per serving
Ingredients
- 1 1/4 lbs boneless, skinless chicken breasts, cut into 1-inch cubes
- 1 Tbsp orange juice
- 1/2 tsp ground coriander
- 1/2 tsp ground ginger
- 1/2 tsp ground cinnamon
- 1/2 tsp ground cumin
- 1/2 tsp salt
- 1/4 tsp garlic powder
- 1/4 tsp freshly ground black pepper
- Cooking spray
- 1 large zucchini, cut into 1-inch-thick half-moons
- 2 small red onions, quartered through the root
- 4 long skewers for assembling the kebabs
Instructions
- Mix the chicken, orange juice, coriander, ginger, cinnamon, cumin, salt, garlic powder and pepper in a large bowl. Cover and refrigerate for 6 hours.
- Off heat, coat grill with cooking spray. Prepare gas grill for direct, high-heat grilling or build a high-heat charcoal bed in the center of the coal grate on a charcoal grill.
- Divide the chicken, zucchini and onion among four large skewers, threading the meat and vegetables over the pointy ends and down the skewers.
- Set the skewers directly over the heat and grill for 16 minutes, turning about every 4 minutes onto each of the other three sides, so that all four sides are well browned. When turning the skewers, use tongs to gently grasp some of the meat at the center. Do not turn the skewers by their ends — or put your hands down near the heat source.
- Serving size: 1 skewer.
|
|